|
|
|
 |
Single Loop Knots
Bowline
There are several variations on tying the bowline, two of
which are presented here. I start with one method of tying that is simple to
photograph and then demonstrate the one handed twist method, which is an
easy and reliable way of forming the loop in the standing part, but a little
harder to convey in pictures. |
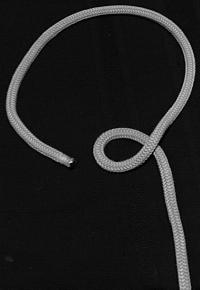
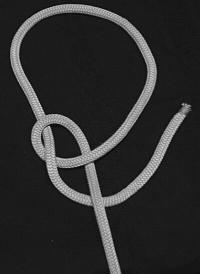
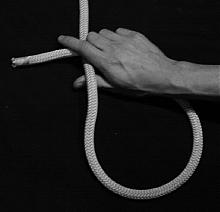
Step #1 |
Arrange the rope as shown, with a small loop in the
standing part and the end going around the object the loop is to be tied
around. |
 |
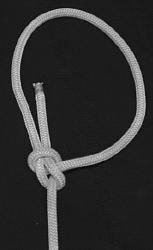
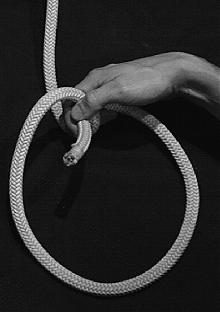
Step #2 |
Insert the end through the loop. |
 |
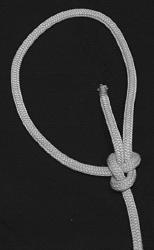
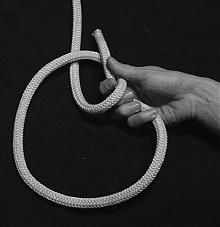
Step #3 |
Pull the end around and behind the standing part. |
 |
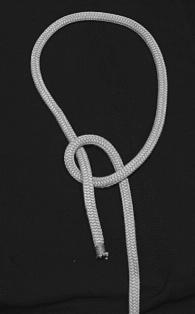
Step #4 |
Insert the end back through the loop. |
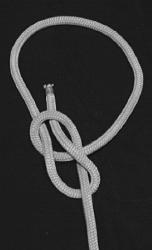 |
Finished Bowline - Front
View |
Dress and set the knot. |
 |
Finished Bowline - Rear
View |
Dress and set the knot. |
 |
Twist
Bowline - One
Handed Twist Method
This is a fast and reliable method for making the loop
in the standing part. This method can also be used to tie a sheet
bend. To use this method for a sheet bend, instead of twisting the end
into a loop in its own standing part (as shown below), twist a loop very
near the end of a second rope. Be sure that the end of the rope you have
in your hand is pointing up and the end of the second rope (that you'll
be twisting a loop into) is pointing down.
Bowline - One Handed
Twist Method - Step #1 |
Grab the end of the rope and place it across the standing
part. Place your thumb under the standing part. |
 |
Bowline - One Handed
Twist Method - Step #2 |
Rotate your wrist clockwise, hooking the standing
part with your thumb and bringing it around in a loop. Keep the end inside
the big loop. |
 |
Bowline - One Handed
Twist Method - Step #3 |
Continue rotating your wrist until the loop is formed
in the standing part with the end threaded through it. Now you can just
weave the end behind the standing part and back down through the loop, as
described above (do this to complete the sheet bend, too). |
 |
Click on the Piece of Eight to return to the Main Page
 |
|
 |
|
|
|